
Project: Temperature Controlled Fermentation Chamber
While the Hot Weather Brew Buddy works great when brewing Ale in the summertime, it won't give you the low temperatures or precise temperature control required for a good Lager. For the cost of a 5 cubic foot chest freezer and a temperature controller, you can build the Temperature Controlled Fermentation Chamber and start lagering!
How it works:
The Temperature Controller plugs into the wall outlet and the 5 Cu. Ft. Chest Freezer plugs into the Temperature Controller. The temperature probe goes into the freezer (between the lid and the base) and tells the Temperature Controller what the internal temperature is. Based on the temperature settings, the Temperature Controller powers the freezer on and off to maintain the desired internal temperature.
Parts List:
| Quantity | Description | Photo |
|---|---|---|
| 1 | 5 Cu. Ft. Chest Freezer | 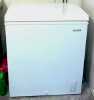 |
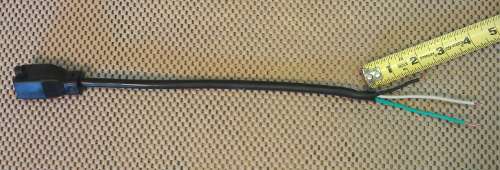
| 1 | Ranco ETC-111000 Temperature Controller | 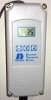 |
| 1 | 6 Foot or Longer Grounded (3 Wire) 16 Gauge Extension Cord | 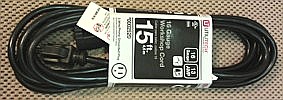 |
| 1 | 3/8" - 1/2" Non Metallic Cable Connector (Strain Relief) | 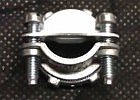 |
| 1' | 14-2 Romex | 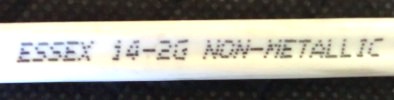 |
| 1 | Medium Wire Nut |  |
Tools:
- #2 Philips Screwdriver
- Flat Blade Screwdriver
- Wire cutters
- Wire strippers
- Pliers
- Needle Nose Pliers
- Utility Knife
- Tape Measure
- Grease Pencil
Instructions:
I suggest you read through the directions before beginning so you are familiar with what needs to be done. Then go back and follow each step as you build your Temperature Controlled Fermentation Chamber.
IMPORTANT: Take proper safety precautions. Be careful to not cut yourself or your work surface when using a utility knife. Do not plug the Temperature Controller into a 110V AC Outlet unless all internal connections are properly made and the cover has been secured with the 4 screws.
Loosen the four, phillips head screwes on the front of the Temperature Controller. They do not need to be removed completely in order to remove the lid. Just back them off until you feel them come free and can easily lift the front off.
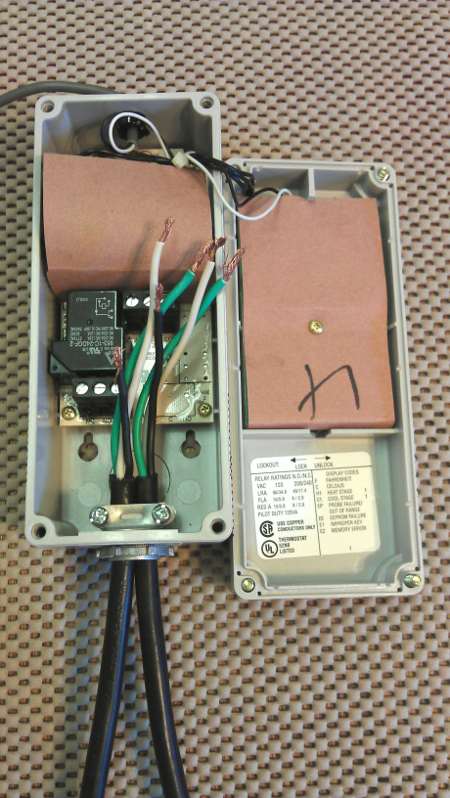
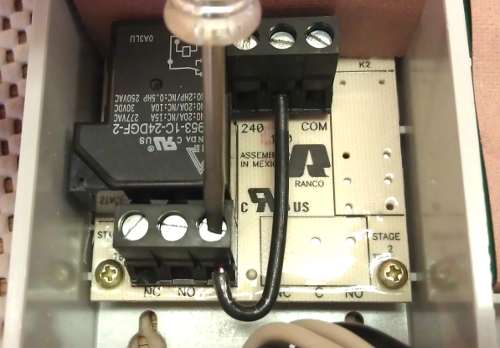
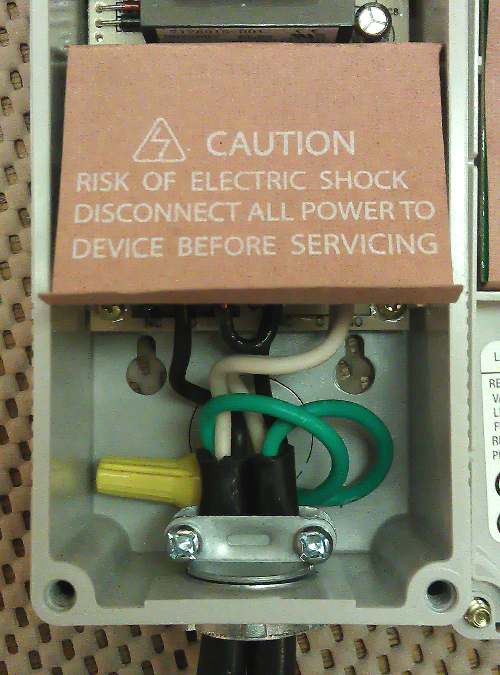
Carefully flip the front over to the right without pulling too hard on the wires connecting the front to the base. Once you lift up on the pink cardboard protector, the insides of the Temperature Controller will look like this:

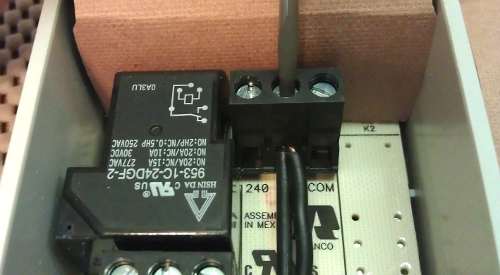
Remove the large threaded retainer ring from the Strain Relief and insert it through the large opening, from the inside. The two small screws used to tighten the Strain Relief should be facing up as shown here:
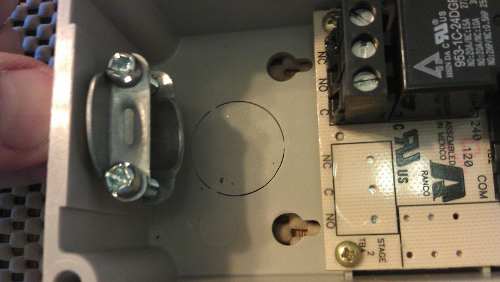
Use regular priers to tighten the threaded retainer ring onto the threads of the Strain Relief that are sticking through the opening. The threaded retainer ring will be on the outside of the Temperature Controller box.
Measure approximately 14" from the socket end (Not the plug end) of the extension cord and make a mark with the grease pencil. IMPORTANT: Make sure the extension cord is not plugged in! Cut the extension cord on the mark with the wire cutters.
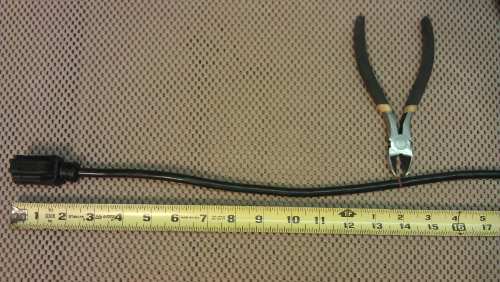
The next thing to do is strip back the wires. I'll go through it step by step and when you're done the two halves will look like this:
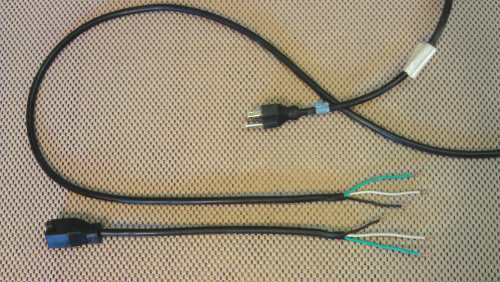
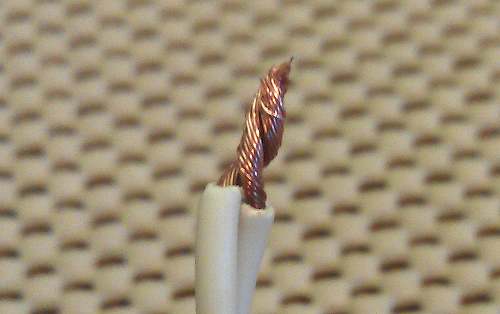
Using the utility knife, carefully remove about 3 1/2" of the outer plastic insulation from the cut end of both pieces of the extension cord. That will expose 3 wires which will most likely be Black, White and Green. Try not to cut into the individual wires inside. Using the wire strippers, strip off about 3/8" from the white and green wires only, exposing the copper wires. The black wires need to be cut to a shorter length before we strip them back.
For the short, socket part of the extension cord, cut the black wire to about 2" in length using the wire cutters. Then using the wire strippers, strip about 3/8" off of the end, exposing the copper wire:

For the long, plug part of the extension cord, cut the black wire to about 2 3/4" in length using the wire cutters. Then using the wire strippers, strip about 3/8" off of the end, exposing the copper wire:

Using the Phillips head screwdriver, loosen the two screws on the strain relief to make room for the extension cord to go through the hole. Push the two parts of the extension cord through the strain relief so that about 3/8" of the black outer covering pokes through. Make sure the short (socket) end is on the left and the long (plug) end is on the right. Evenly tighten the two screws on the strain relief until the extension cord is held securely in place. It should not move when you give it a firm tug. It should now look like this:
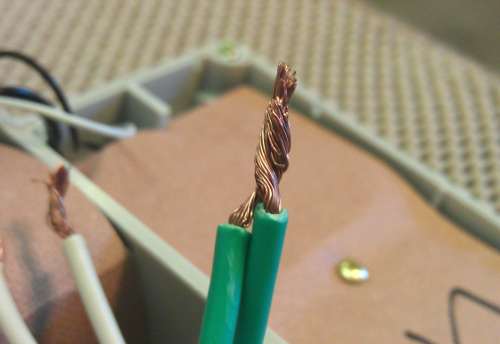
Locate the two green wires and twist the copper part together:
Next, screw on the wire nut until it won't turn any more:
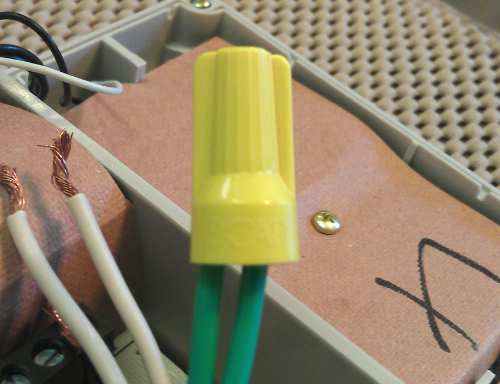
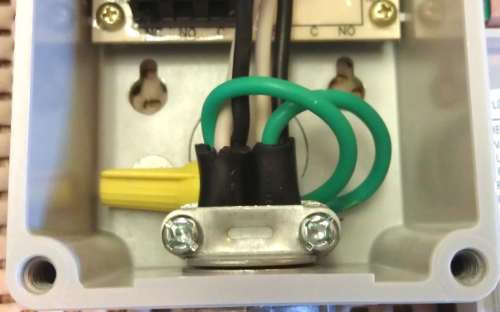
Tuck the green wires under the rest of the wires, so they are out of the way:
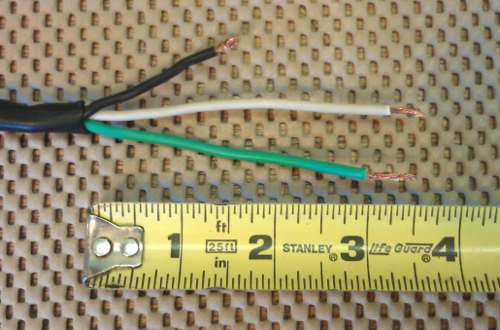
Measure 2 3/4" from one end of the 14-2 Romex and mark it with the grease pencil:
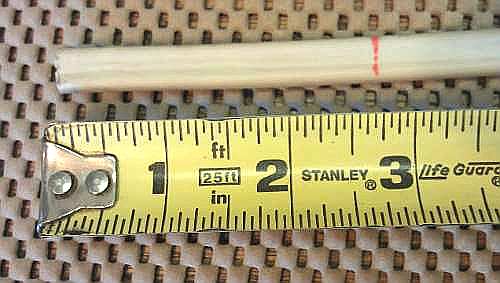
Using the wire cutters, cut the Romex on the mark. It's easier if you only cut through one of the three inner wires at a time. Remove the black wire and discard the rest. We only need the black wire:
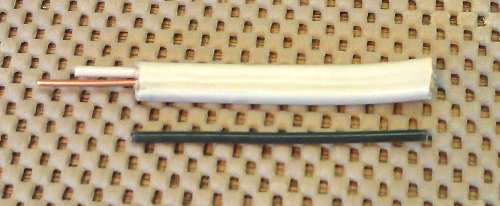
Using the wire strippers, remove about 1/4" of insulation from both ends, exposing the copper wire:
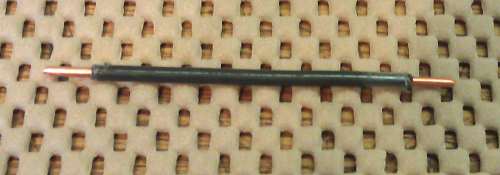
Using the needle nose pliers, form the black wire into a J shape. It should measure 1 1/4" between the two ends of the wire:

Insert the J shaped black wire into the two terminal blocks, as shown. The wire goes into the right terminal of the bottom block and the center terminal of the top block. Tighten the right screw on the bottom block with the flat blade screwdriver, to secure the wire in place. Don't tighten the center screw of the top block, just yet. It should now look like this:
Locate the shorter of the two black wires. It should be on the left (socket) side. Twist the end so that the individual strands of the wire stay together. Use the needle nose pliers to insert it into the middle terminal of the bottom terminal block. Tighten the screw:

Locate the longer of the two black wires. It should be on the right (plug) side. Twist the end so that the individual strands of the wire stay together. Use the needle nose pliers to insert it into the middle terminal of the top terminal block along with the existing J shaped black wire. Make sure both wires are in the middle terminal. Tighten the screw:
Locate the remaining two white wires and twist the strands together. This will help the two wires stay together:
Insert the two white wires into the right terminal of the top terminal block. Tighten the right screw:

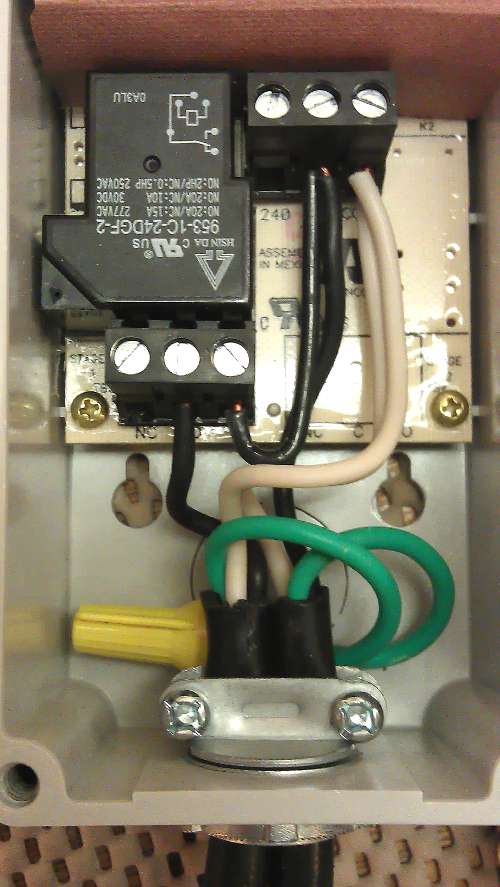
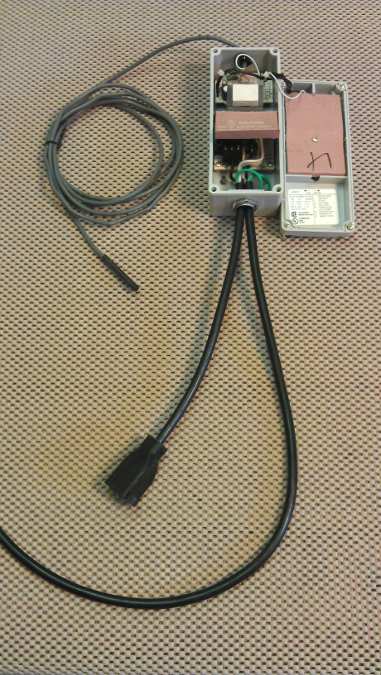
That's all there is to wiring the Temperature Controller. Make sure all of the terminal block screws are tight. It should now look like this:
Flip the pink cardboard protector back over the circuit board:
 |  |
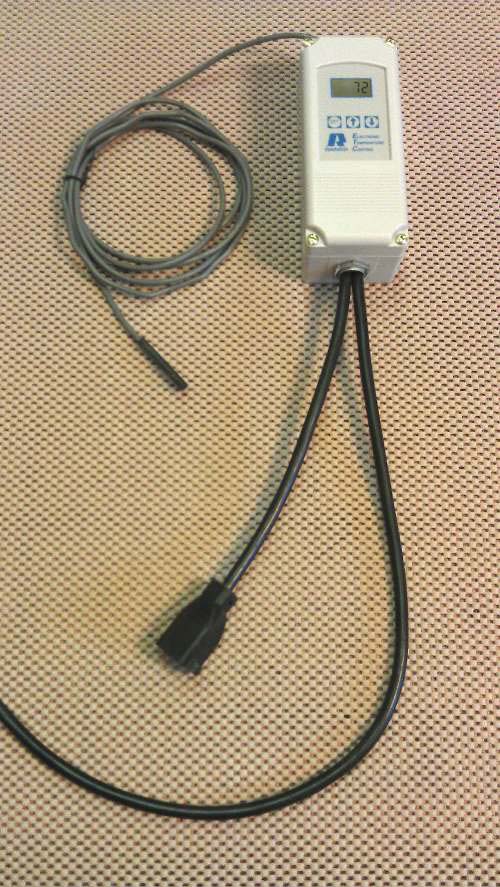
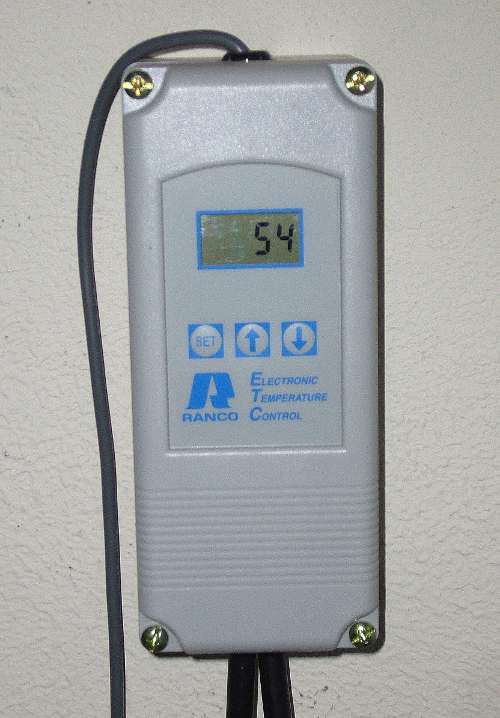
Flip the lid back over and tighten the four screws. It is now safe to plug the temperature controller into a grounded 110V AC electrical outlet. The display should come on and it will most likely be displaying the temperature in the room, since that is where the temperature probe is:
 |  |
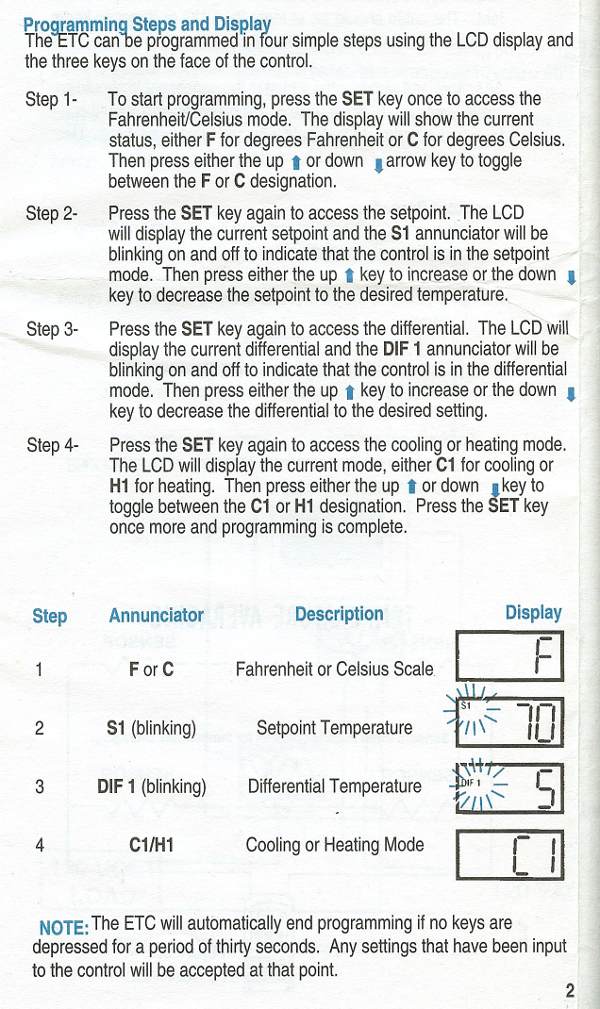
Programming:
Programming is very easy. The Temperature Controller has its normal operating mode and four programming steps, Each time the SET key is pressed the unit will switch from one programming step to the next and finally back to normal operating mode. These are the programming steps:
| Step | Display | Description |
|---|---|---|
| 1 | F or C | Fahrenheit or Celsius |
| 2 | -30 to 220 | Setpoint Temperature |
| 3 | 1 to 30 | Differential Temperature |
| 4 | C1 or H1 | Cooling or Heating |
In each step, use the UP Arrow and DOWN Arrow keys to change that setting. For me, step 3 was the only one I had trouble understanding. It's basically the number of degrees the temperature inside the Chest Freezer has to drift, away from the setpoint temperature, before the Temperature Controller will kick the power back on. I keep mine at 1 so that as soon as the temperature of my beer goes up one degree, the freezer turns on and brings it back to where it should be. I want the temperature to swing as little as possible.
Here are the official programming instructions:
Installation:
If you're planning on mounting the controller on the wall like I did, use four small screws with plastic wall anchors. Make sure the heads of the screws fit in the holes in the back of the controller. Don't tighten the screws down all the way. Leave them out about 1/8":
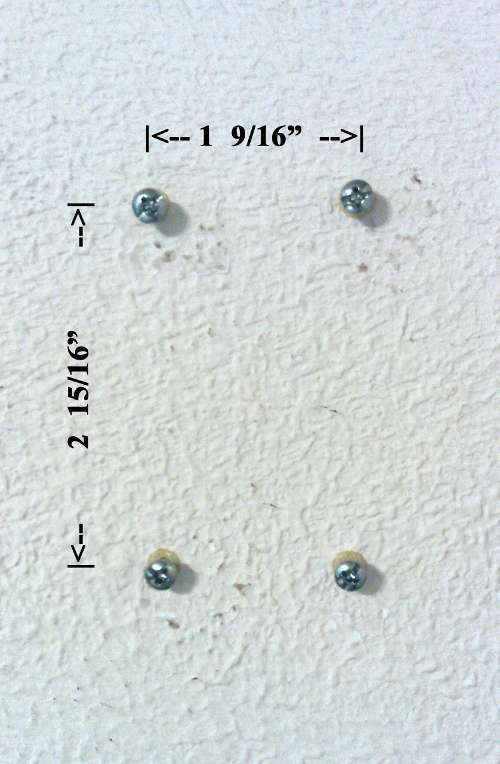
The controller should slide over the screws and drop down into the slots, holding it securely to the wall.
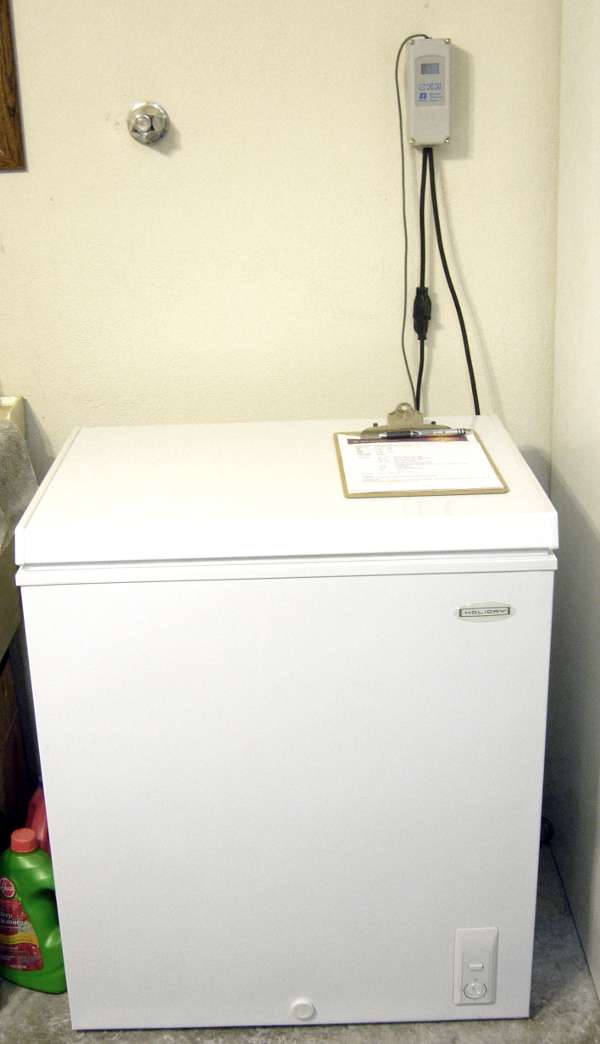
Set the Chest Freezer's thermostat to the coldest setting. Plug the Temperature Controller into a grounded 110V AC wall outlet and plug the Chest Freezer into the Temperature Controller. Feed the temperature probe through the opening in the back when the Chest Freezer's lid is up. Your Temperature Controlled Fermentation Chamber should look something like this:
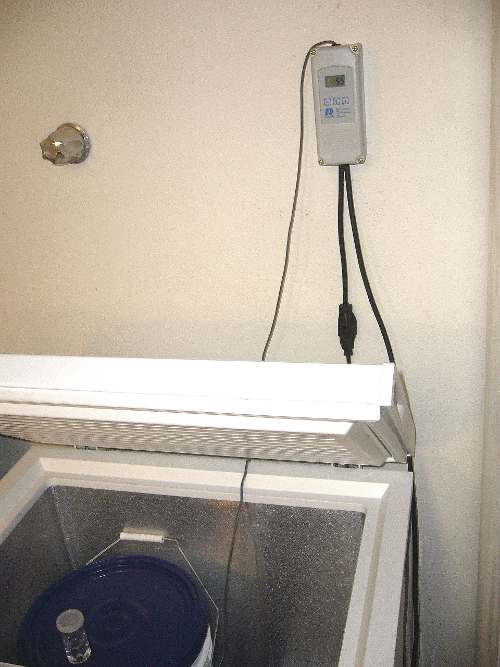
I always use Duct Tape to secure the probe directly to my bucket or carboy. That way the Temperature Controller can get a precise temperature reading of the thing we are most interested in, the beer!
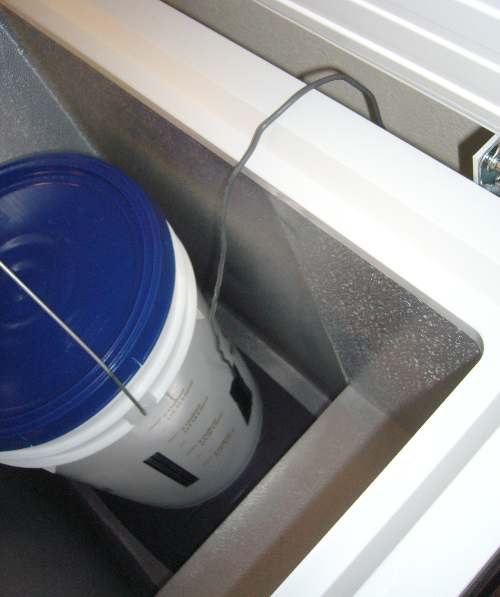
That's my latest batch of Lager you see in there. I hope it turns out as good as my first batch! I try to keep my Temperature Controlled Fermentation Chamber busy, all the time, with a batch of Ale or Lager. When a batch is lagering in the carboy, I always have the option of brewing a batch of Ale at the same time using the Hot Weather Brew Buddy. Happy brewing!